Setup
Setting up a smartnode requires a basic understanding of Linux and blockchain technology, as well as an ability to follow instructions closely. It also requires regular maintenance and careful security, particularly if you are not storing your SmartCash on a hardware wallet. There are some decisions to be made along the way, and optional extra steps to take for increased security.
Commercial smartnode hosting services are available if you prefer to delegate day-to-day operation of your smartnode to a professional operator. When using these hosting services, you retain full control of the 100000 SmartCash collateral and pay an agreed percentage of your reward to the operator.
Before you begin
This guide assumes you are setting up a single smartnode for the first time. If you are updating a smartnode, see here instead. You will need:
- 100000 SmartCash
- A wallet to store your SmartCash, preferably a hardware wallet, although SmartCash NodeClient wallet is also supported
- A Linux server, preferably a Virtual Private Server (VPS)
A list of available documentation appears below:
This documentation describes the commands as if they were
entered in the SmartCash NodeClient GUI by opening the console from Help > Debug
console, but the same result can be achieved on a smartnode by
entering the same commands and adding the prefix
smartcash-cli to each command.
Set up your VPS
A VPS, more commonly known as a cloud server, is fully functional installation of an operating system (usually Linux) operating within a virtual machine. The virtual machine allows the VPS provider to run multiple systems on one physical server, making it more efficient and much cheaper than having a single operating system running on the “bare metal” of each server. A VPS is ideal for hosting a SmartCash smartnode because they typically offer guaranteed uptime, redundancy in the case of hardware failure and a static IP address that is required to ensure you remain in the smartnode payment queue. While running a smartnode from home on a desktop computer is technically possible, it will most likely not work reliably because most ISPs allocate dynamic IP addresses to home users.
We will use Vultr hosting as an example of a VPS, although DigitalOcean, Amazon EC2, Google Cloud, Choopa and OVH are also popular choices. First create an account and add credit. Then go to the Servers menu item on the left and click + to add a new server. Select a location for your new server on the following screen:
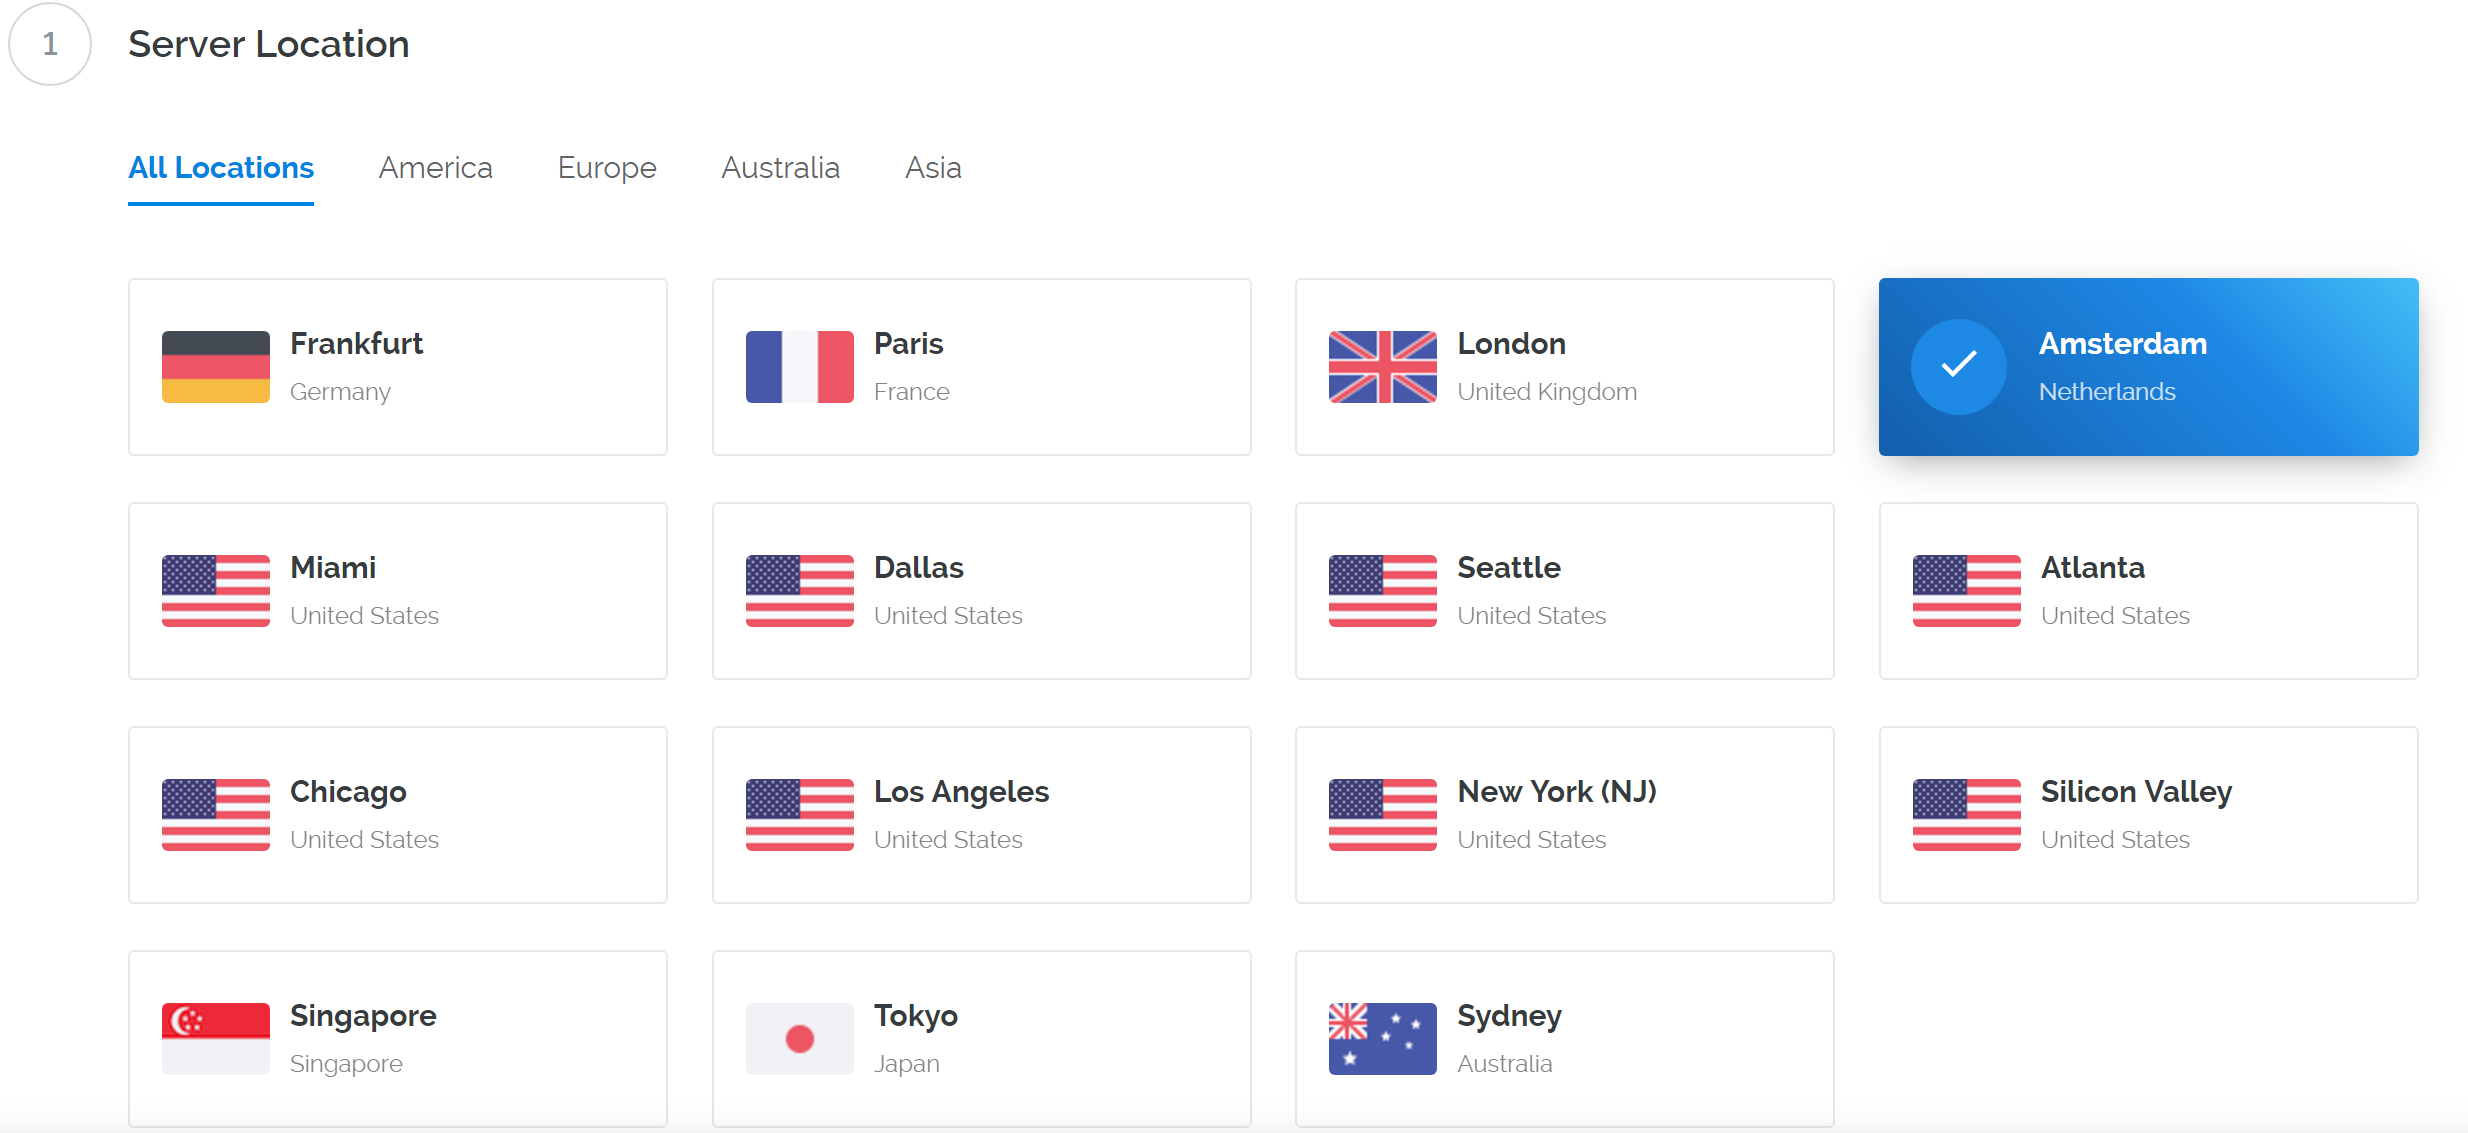
Vultr server location selection screen
Select Ubuntu 16.04 x64 as the server type. We use this LTS release of Ubuntu instead of the latest version because LTS releases are supported with security updates for 5 years, instead of the usual 9 months.
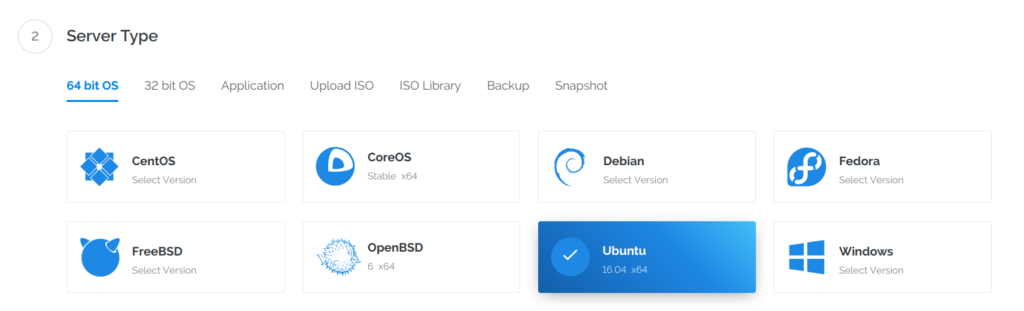
Vultr server type selection screen
Select a server size offering at least 2GB of memory.
Vultr server size selection screen
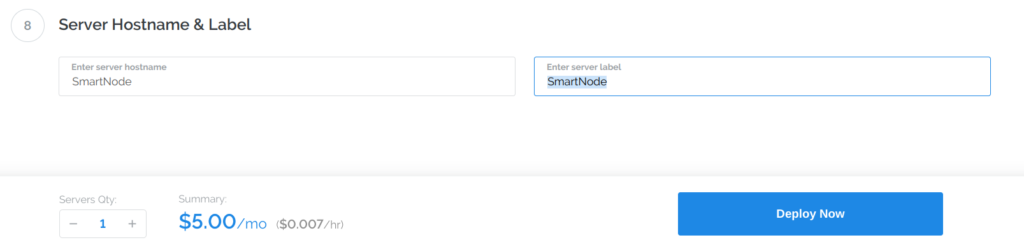
Enter a hostname and label for your server. In this example we will use
SmartNode as the hostname.

Vultr server hostname & label selection screen
Vultr will now install your server. This process may take a few minutes.
Click Manage when installation is complete and take note of the IP address, username and password.

Vultr server management screen
Set up your operating system
We will begin by connecting to your newly provisioned server. On
Windows, we will first download an app called PuTTY to connect to the
server. Go to the PuTTY download page
and select the appropriate MSI installer for your system.
On Mac or Linux you can ssh directly from
the terminal - simply type ssh root@<server_ip> and enter your
password when prompted.
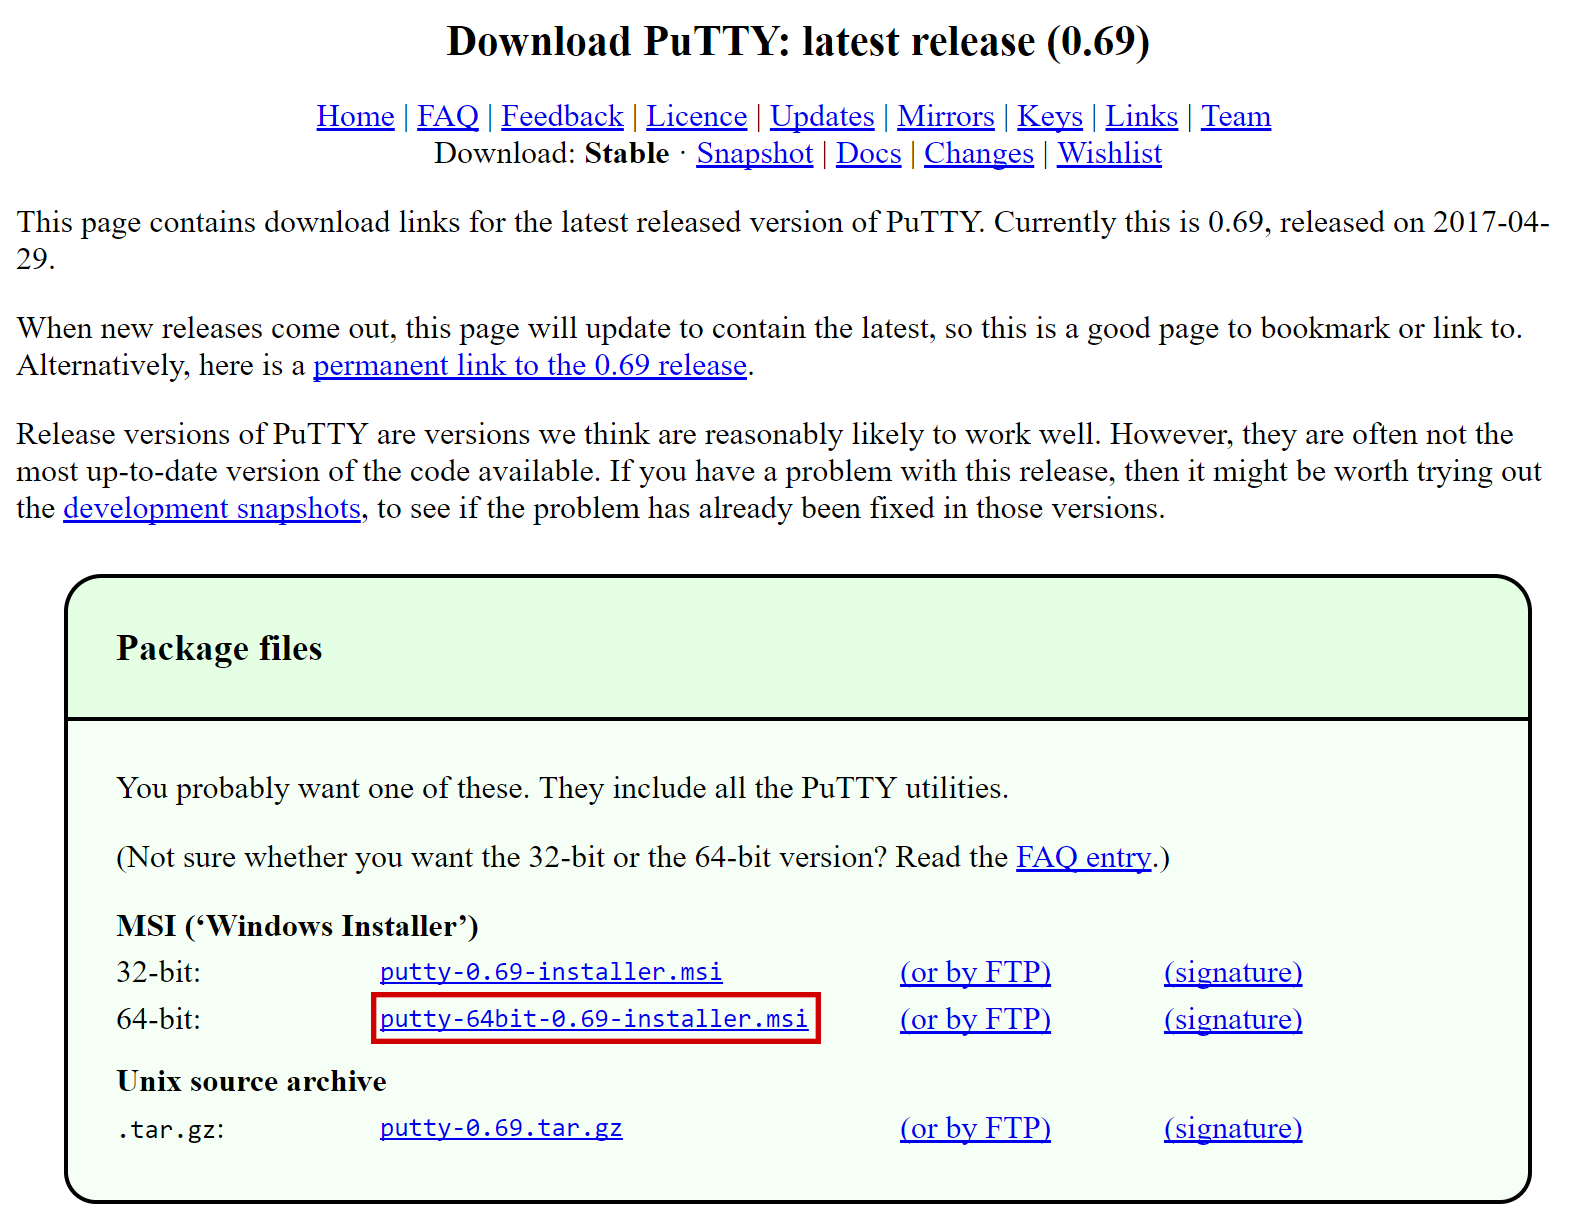
PuTTY download page
Double-click the downloaded file to install PuTTY, then run the app from your Start menu. Enter the IP address of the server in the Host Name field and click Open. You may see a certificate warning, since this is the first time you are connecting to this server. You can safely click Yes to trust this server in the future.
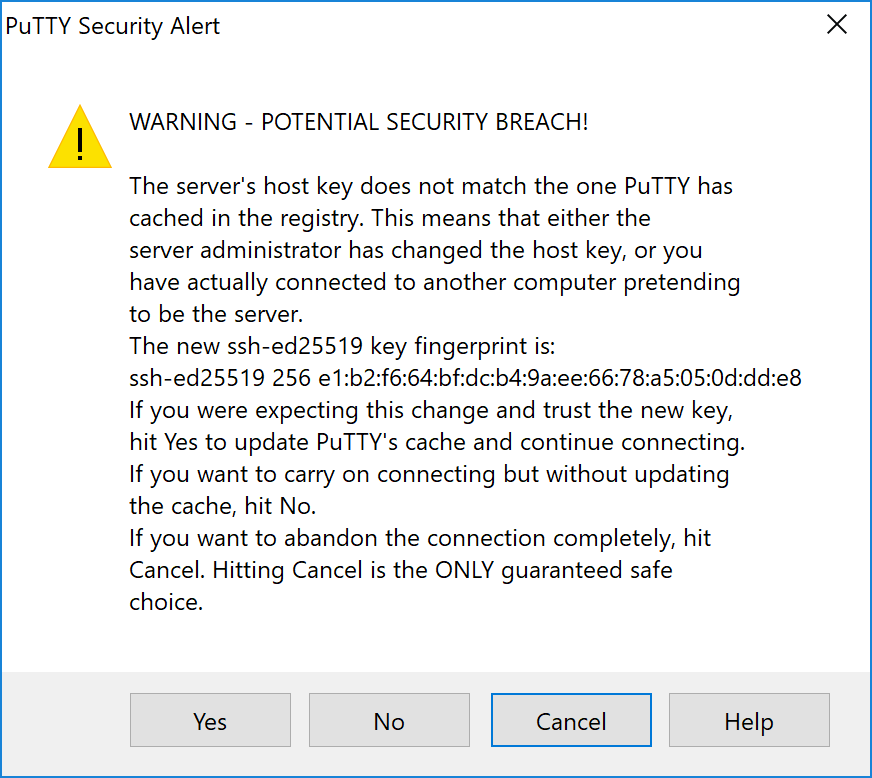
PuTTY security alert when connecting to a new server
You are now connected to your server and should see a terminal
window. Begin by logging in to your server with the user root and
password supplied by your hosting provider.
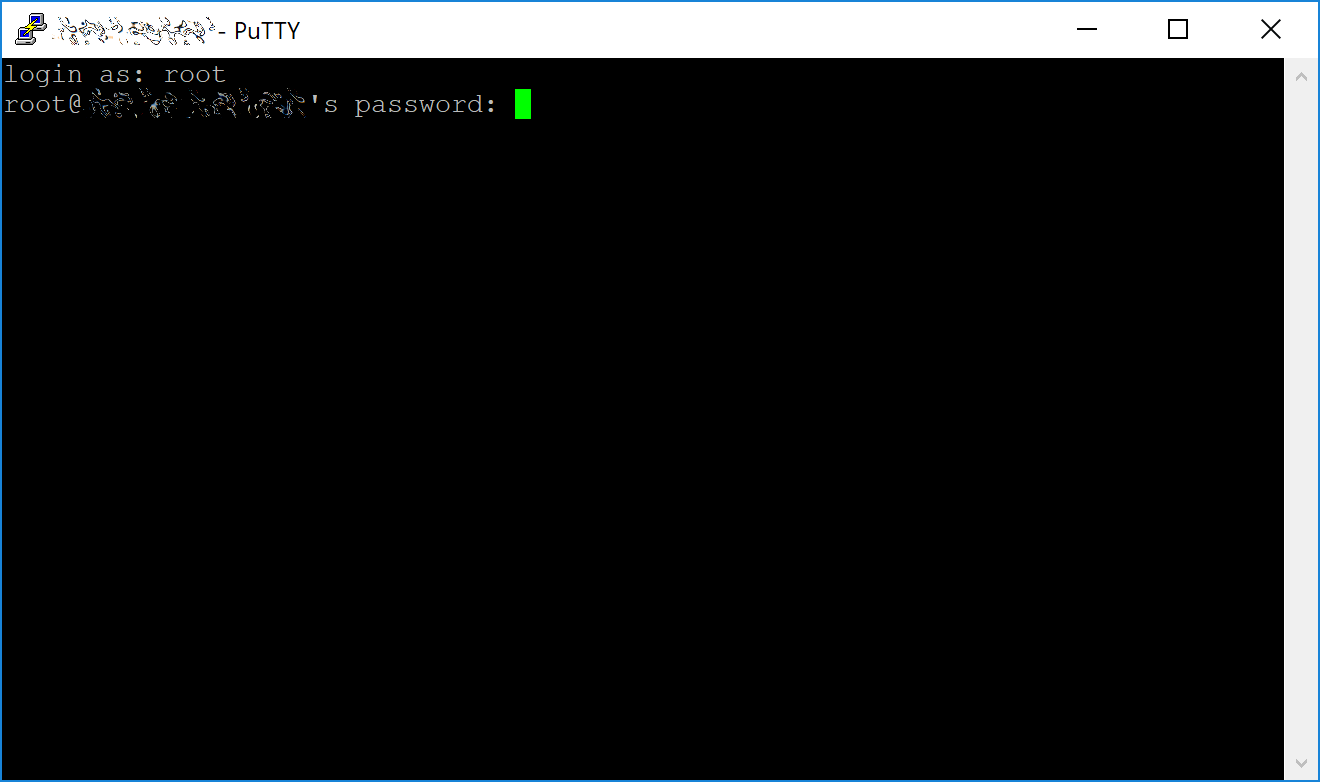
Password challenge when connecting to your VPS for the first time
You should immediately change the root password and store it in a safe place for security. You can copy and paste any of the following commands by selecting them in your browser, pressing Ctrl + C, then switching to the PuTTY window and right-clicking in the window. The text will paste at the current cursor location:
passwd root
Enter and confirm a new password (preferably long and randomly
generated). Next we will create a new user with the following command,
replacing <username> with a username of your choice:
adduser <username>
You will be prompted for a password. Enter and confirm using a new password (different to your root password) and store it in a safe place. You will also see prompts for user information, but this can be left blank. Once the user has been created, we will add them to the sudo group so they can perform commands as root:
usermod -aG sudo <username>
Now, while still as root, we will update the system from the Ubuntu package repository:
apt update
apt upgrade
The system will show a list of upgradable packages. Press Y and Enter to install the packages. We will now install a firewall (and some other packages we will use later), add swap memory and reboot the server to apply any necessary kernel updates, and then login to our newly secured environment as the new user:
apt install ufw python virtualenv git unzip pv
(press Y and Enter to confirm)
ufw allow ssh/tcp
ufw limit ssh/tcp
ufw allow 9678/tcp
ufw logging on
ufw enable
(press Y and Enter to confirm)
fallocate -l 4G /swapfile
chmod 600 /swapfile
mkswap /swapfile
swapon /swapfile
nano /etc/fstab
Add the following line at the end of the file (press tab to separate each word/number), then press Ctrl + X to close the editor, then Y and Enter save the file.
/swapfile none swap sw 0 0
Finally, in order to prevent brute force password hacking attacks, open the SSH configuration file to disable root login over SSH:
nano /etc/ssh/sshd_config
Locate the line that reads PermitRootLogin yes and set it to
PermitRootLogin no. Directly below this, add a line which reads
AllowUsers <username>, replacing <username> with the username
you selected above. The press Ctrl + X to close the editor, then
Y and Enter save the file.
Then reboot the server:
reboot now
PuTTY will disconnect when the server reboots.
While this setup includes basic steps to protect your server against attacks, much more can be done. In particular, authenticating with a public key instead of a username/password combination, installing fail2ban to block login brute force attacks and enabling automatic security updates is advisable. More tips are available here. However, since the smartnode does not actually store the keys to any SmartCash, these steps are considered beyond the scope of this guide.
Send the collateral
A SmartCash address with a single unspent transaction output (UTXO) of exactly 100000 SmartCash is required to operate a smartnode. Once it has been sent, various keys regarding the transaction must be extracted for later entry in a configuration file and registration transaction as proof to write the configuration to the blockchain so the smartnode can be included in the deterministic list. A smartnode can be started from a hardware wallet or the official SmartCash NodeClient wallet, although a hardware wallet is highly recommended to enhance security and protect yourself against hacking. This guide will describe the steps for SmartCash NodeClient.
Sending from SmartCash NodeClient wallet
Open SmartCash NodeClient wallet and wait for it to synchronize with the network.
Click Help > Debug Windows to open the console. Type the following two commands into the console to generate a legacy smartnode key
smartnode genkey
7REvo76RN2Z92kyU7NcC5FBtsRGTNXfnNuLGQQPrcgk1NKRBQSn
Take note of the legacy smartnode private key and collateral address, since we will need it later. The next step is to secure your wallet (if you have not already done so). First, encrypt the wallet by selecting Settings > Encrypt wallet. You should use a strong, new password that you have never used somewhere else. Take note of your password and store it somewhere safe or you will be permanently locked out of your wallet and lose access to your funds. Next, back up your wallet file by selecting File > Backup Wallet. Save the file to a secure location physically separate to your computer, since this will be the only way you can access our funds if anything happens to your computer. For more details on these steps, see here.
Now send exactly 100000 SmartCash in a single transaction to the new address you generated in the previous step. This may be sent from another wallet, or from funds already held in your current wallet. Once the transaction is complete, view the transaction in a blockchain explorer by searching for the address. You will need 15 confirmations before you can start the smartnode, but you can continue with the next step at this point already: installing SmartCash NodeClient on your VPS.
Install SmartCash NodeClient on VPS
SmartCash NodeClient is the software behind both the SmartCash NodeClient GUI wallet and SmartCash smartnodes. If not displaying a GUI, it runs as a daemon on your VPS (smartcashd), controlled by a simple command interface (smartcash-cli).
Open PuTTY or a console again and connect using the username and password you just created for your new, non-root user.
Option 1: Automated installation using Bash installer
To install SmartCash using Bash installer, enter the following commands after logging in:
cd ~
wget https://raw.githubusercontent.com/SmartCash/smartnode/master/install.sh
Then press enter.
Then type:
bash ./install.sh
Then press enter and answer each question the script ask.
Your system is now running as a standard SmartCash node, and is busy completing synchronisation with the blockchain.
Option 2: Manual installation
To manually download and install the components of your SmartCash smartnode,
visit the GitHub releases page
and copy the link to the latest x86_64-linux-gnu version. Go back to
your terminal window and enter the following command, pasting in the
address to the latest version of SmartCash NodeClient by right clicking or pressing
Ctrl + V:
cd /tmp
wget https://github.com/SmartCash/Core-Smart/releases/download/v1.3.0/smartcash-1.3.0-x86_64-linux-gnu.tar.gz
Verify the integrity of your download by running sha256sum (optional)
Create a working directory for SmartCash, extract the compressed archive and copy the necessary files to the directory:
mkdir ~/.nodeclient
tar xfv smartcash-1.3.0-x86_64-linux-gnu.tar.gz
cp -f smartcash-1.3.0/bin/smartcashd ~/.nodeclient/
cp -f smartcash-1.3.0/bin/smartcash-cli ~/.nodeclient/
Create a configuration file using the following command:
nano ~/.smartcash/smartcash.conf
An editor window will appear. We now need to create a configuration file specifying several variables. Copy and paste the following text to get started, then replace the variables specific to your configuration as follows:
#----
rpcuser=XXXXXXXXXXXXX
rpcpassword=XXXXXXXXXXXXXXXXXXXXXXXXXXXX
rpcallowip=127.0.0.1
port=9678
#----
listen=1
server=1
daemon=1
maxconnections=64
#----
smartnode=1
smartnodeprivkey=XXXXXXXXXXXXXXXXXXXXXXX
externalip=XXX.XXX.XXX.XXX
#----
Replace the fields marked with XXXXXXX as follows:
rpcuser: enter any string of numbers or letters, no special characters allowedrpcpassword: enter any string of numbers or letters, no special characters allowedsmartnodeprivkey: this is the legacy smartnode private key you generated in the previous stepexternalip: this is the IP address of your VPS
The result should look something like this:
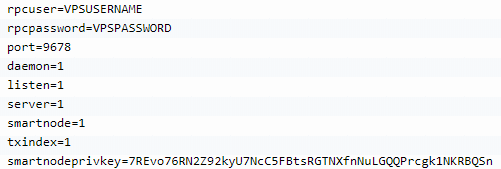
Entering smartnode genkey data in smartcash.conf
Press Ctrl + X to close the editor and Y and Enter save the file. You can now start running SmartCash on the smartnode to begin synchronization with the blockchain:
~/.nodeclient/smartcashd
You will see a message reading SmartCash server starting.
You will see a message reading smartcashd not synced with network! Awaiting full sync before running Sentinel. We now need to wait for 15 confirmations of the collateral transaction to complete, and wait for the blockchain to finish synchronizing on the smartnode. You can use the following commands to monitor progress:
~/.nodeclient/smartcash-cli snsync status
When synchronisation is complete, you should see the following response:
 {
 "AssetID": 999,
 "AssetName": "SMARTNODE_SYNC_FINISHED",
 "Attempt": 0,
 "IsBlockchainSynced": true,
 "IsSmartNodeSyncStarted": true,
 "IsSmartnodeListSynced": true,
 "IsWinnersListSynced": true,
 "IsSynced": true,
 "IsFailed": false
}
Continue with the next step to construct the ProTx transaction required to enable your smartnode.
Start your smartnode
Start from SmartCash NodeClient wallet
Identify the transaction
If you used an address in SmartCash NodeClient wallet for your collateral transaction, you now need to find the txid of the transaction. Click Help > Debug Windows and enter the following command:
smartnode outputs
This should return a string of characters similar to this:
{
"1a2f7cf157cc8f0bfc35562b69039b05197cd909e6b41a1730bcacd205fe984e " : "1",
}
The first long string is your transaction hash, while the last number is the index.
Add the private key to your smartnode configuration
edit smartnode.conf
the content will look like this:
smartnode1 46.77.121.22:9678 7QR3UF8WXgATf2ciiKqjDzF3SGFmf4e3jrxpUct4doWtyfetmyM 1a2f7cf157cc8f0bfc35562b69039b05197cd909e6b41a1730bcacd205fe984e 1
Double check ip of your VPS and the info in the smartnode.conf in Desktop wallet ( when have as many VPS will have as many row in smartnode.conf )
Warning
Wait at least 15 confirmations (if you attempt to start your smartnode before you get 15 confirmations, your smartnode won’t work and you have to restart procedure). You can check number of Collateral confirmations in explorer.
Go to SmartNodes tab > My SmartNodes
and Press Start MISSING
Status column will show PRE-ENABLE and after ( nearly 10 minutes ) it become ENABLE
Check status in VPS
run this command in console:
smartcash-cli smartnode status
When you see this mean your smartnode are successful started:
"status": "Smartnode successfully started"
Congratulations! Your smartnode is now running.